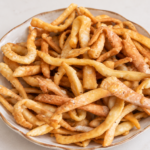
Namak pare are a simple, crispy Indian savory snack made with flour, ajwain, salt, and a few basic pantry ingredients. They’re lightly seasoned, crunchy, and perfect with a hot cup of chai or whenever you feel like having something savory.
The secret to really good namak pare is in a few small details: getting the right amount of oil into the flour, keeping the dough slightly firm, and frying them slowly at the right temperature. In this recipe, I’ll also share an easy way to check both the dough and the frying oil, so you can get crisp namak pare every time.
Why You’ll Love This Recipe
- Simple ingredients – Made with basic pantry staples like flour, oil, salt, and ajwain.
- Crispy and crunchy – A firm dough and slow frying help create that classic crisp namak pare texture.
- Helpful texture test – The simple fist test helps you know whether enough oil has been mixed into the flour before adding water.
- Easy oil-temperature check – No thermometer needed. A tiny piece of dough tells you when the oil is ready for frying.
- Great for storing – Make a batch, cool completely, and keep them in an airtight container for an easy savory snack.
Ingredients
- 3 cups all-purpose flour (maida)
- ¼ cup oil, plus 1–2 tablespoons more if needed
- ½ teaspoon salt
- 1 teaspoon ajwain (carom seeds)
- Up to ½ cup water, or as needed to make a firm dough
- Oil for deep frying
A Few Ingredient Notes
Oil: The oil mixed into the flour is important for getting the right texture. Start with ¼ cup. After mixing it thoroughly into the flour, use the fist test described below. If the mixture doesn’t hold its shape, add another 1–2 tablespoons of oil before adding any water.
Ajwain: Ajwain gives namak pare their classic savory flavor. You can lightly crush it between your palms before adding it to the flour to help release its aroma.
Water: Add water gradually rather than adding the entire ½ cup at once. You may need less depending on your flour. The goal is a firm, slightly tight dough, not a soft dough.
How to Make Namak Pare
Step 1: Prepare the Dough
Add the all-purpose flour, salt, and ajwain to a large mixing bowl and mix well.
Add ¼ cup oil and use your fingertips to thoroughly work it into the flour. Continue mixing until the flour looks grainy and sandy and the oil is evenly distributed.
Step 2: Do the Fist Test
Before adding any water, take a small handful of the flour mixture and close your fist around it.
Open your hand. The mixture should hold its shape rather than immediately crumble apart. If it doesn’t hold together, add 1–2 tablespoons more oil, mix thoroughly, and test again.
This simple test helps you know whether the flour has enough oil before you start making the dough.
Step 3: Add Water and Rest the Dough
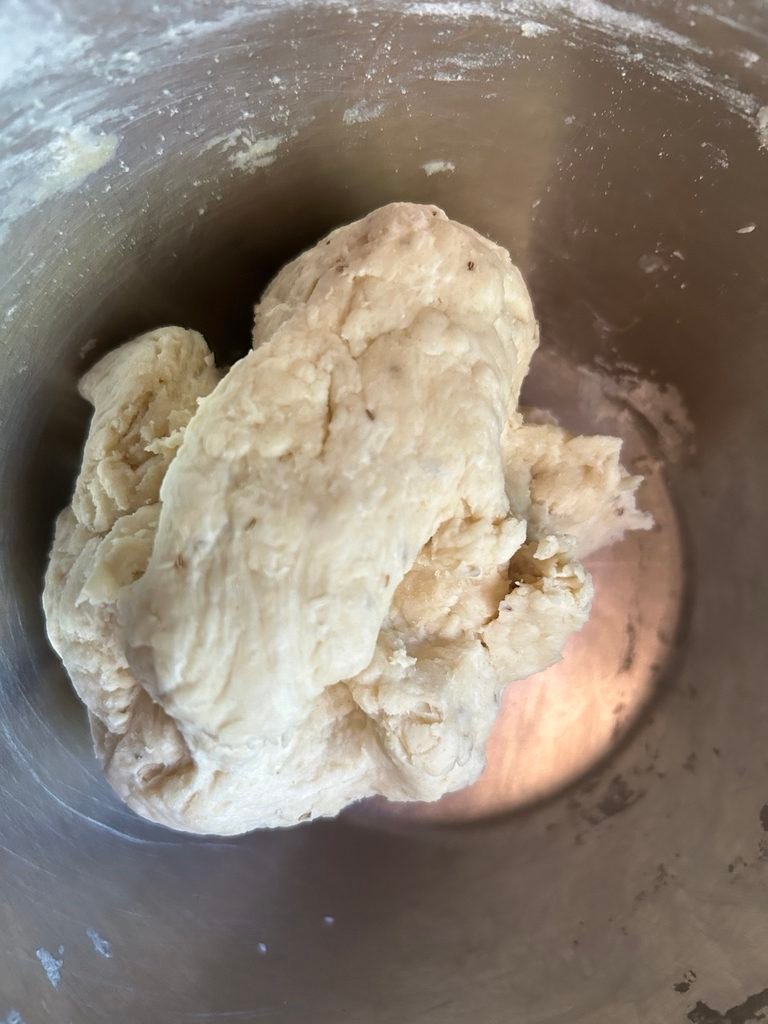
Add water a little at a time, bringing the flour together into a dough. You may not need the entire ½ cup.
The dough should be firm and slightly tight, but not hard. Avoid making a very soft dough, as a firmer dough helps give namak pare their crisp texture.
Cover the dough and let it rest for at least 5–10 minutes.
Step 4: Roll and Cut
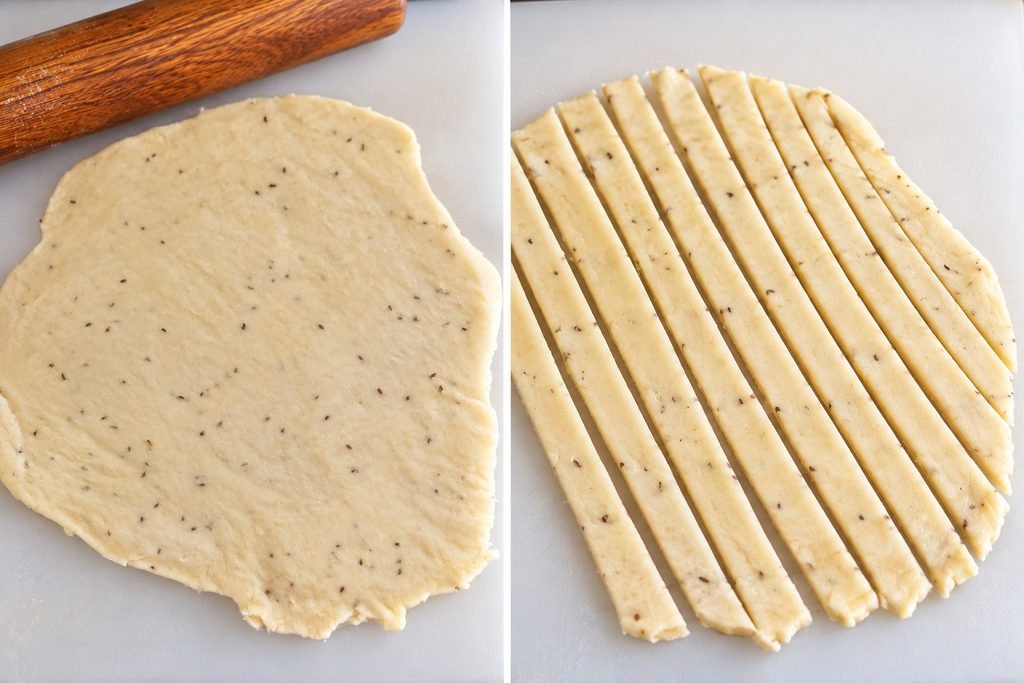
Divide the rested dough into smaller portions so it is easier to work with.
Roll each portion to approximately ¼-inch thick or slightly thinner, depending on how thick you like your namak pare.
Cut the rolled dough into thin strips, then cut them into your preferred size.
Step 5: Heat and Test the Oil
Heat the frying oil over medium heat.
To check whether it is ready, drop a tiny piece of dough into the oil.
If it rises very quickly and begins taking on color right away, the oil is too hot. If it stays at the bottom, the oil is not hot enough.
The oil is at the right temperature when the little piece of dough slowly rises toward the surface without browning immediately.
Step 6: Fry Slowly
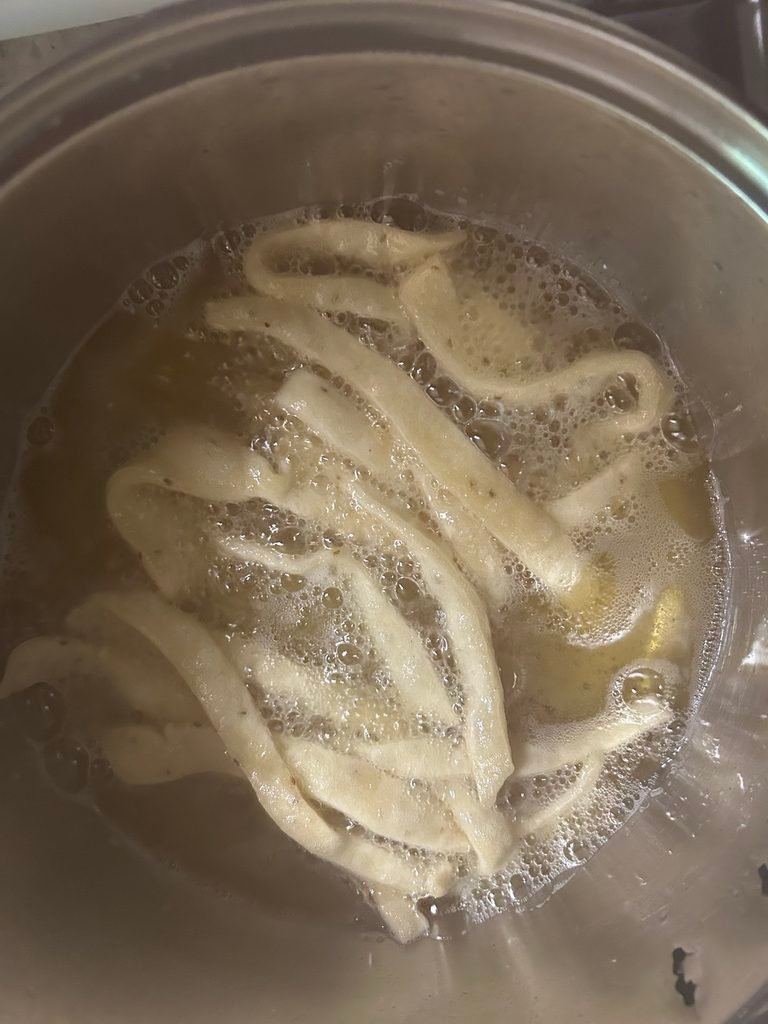
Carefully add the namak pare to the oil in batches without overcrowding the pan. Keep the heat at medium-low.
For the first 2–3 minutes, leave them undisturbed. After that, gently stir and flip them occasionally so they cook evenly on all sides.
Continue frying slowly until they are light golden and crisp.
Important: Namak pare continue to deepen slightly in color after they come out of the hot oil. Remove them when they are light golden rather than waiting for them to become dark golden in the pan.
Step 7: Cool Completely
Remove the namak pare with a slotted spoon and transfer them to a paper towel-lined plate or tray.
Let them cool completely. They will become even crisper as they cool.
Once completely cooled, transfer them to an airtight container.
Tips for Perfect Crispy Namak Pare
- Don’t make a soft dough. Keep the dough slightly firm and tight. A soft dough can affect the crisp texture of the namak pare.
- Add water gradually. Different flours may absorb slightly different amounts of water, so use only as much as you need to bring the dough together.
- Don’t skip the oil test in the flour. If the flour mixture doesn’t hold together when pressed in your fist, mix in another 1–2 tablespoons of oil before adding water.
- Fry on medium-low heat. If the oil is too hot, the namak pare can brown quickly on the outside before becoming properly crisp inside.
- Don’t overcrowd the pan. Fry in batches so the oil temperature stays more consistent and the pieces have room to cook evenly.
- Remove them while light golden. They will become slightly darker after coming out of the hot oil.
- Cool completely before storing. Putting warm namak pare into an airtight container can trap moisture and soften them.
How to Store Namak Pare
Allow the namak pare to cool completely before storing them. Once cooled, transfer them to a clean, dry airtight container and keep at room temperature.
When stored properly, these namak pare can stay good and crisp for up to 1 month.
Always use dry hands or a dry spoon when taking them out of the container, and make sure no moisture gets inside. This will help them stay crisp for longer.
Frequently Asked Questions
Why are my namak pare not crispy?
A soft dough or incorrect frying temperature can affect the texture. Keep the dough firm and slightly tight, and fry the namak pare slowly over medium-low heat. If the oil is too hot, they can brown on the outside before becoming crisp all the way through.
Why did my namak pare absorb too much oil?
One possible reason is that the frying oil was not hot enough when the namak pare were added. Use the small dough-piece test before frying. The dough should rise slowly toward the surface. If it stays at the bottom, allow the oil to heat a little longer.
Can I make namak pare with whole wheat flour?
You can replace some or all of the all-purpose flour with whole wheat flour, but the flavor and texture will be different. You may also need to adjust the amount of water because whole wheat flour can absorb water differently.
Can I bake or air-fry these namak pare?
This particular recipe is made using the traditional deep-frying method. Baking or air-frying may work, but the texture and cooking time will be different from the fried version.
How thin should I roll namak pare?
Roll the dough approximately ¼-inch thick or slightly thinner, depending on the texture and thickness you prefer. Just try to keep the thickness fairly even so the pieces cook at a similar rate.
Why do namak pare look darker after frying?
They continue to deepen slightly in color from the residual heat after being removed from the oil. Take them out when they are light golden rather than waiting until they become dark golden in the pan.
Why did my namak pare turn out hard?
Namak pare can turn hard if the dough is over-kneaded or there isn’t enough oil incorporated into the flour.
Mix the oil thoroughly into the flour before adding any water, and use the fist test to check the texture. When squeezed in your hand, the flour mixture should hold its shape. If it crumbles immediately, add another 1–2 tablespoons of oil and mix again.
Once you begin adding water, bring the dough together just until it binds. There is no need to knead it extensively. The dough should be firm and slightly tight, but not hard.
Why did my namak pare puff up like pooris while frying?
If your namak pare puff up too much while frying, the dough may be too soft or have too much water.
Add water only a little at a time and make a firm, slightly tight dough rather than a soft one. The dough only needs enough water to come together. This helps the namak pare keep their shape and develop a crisp texture while frying.
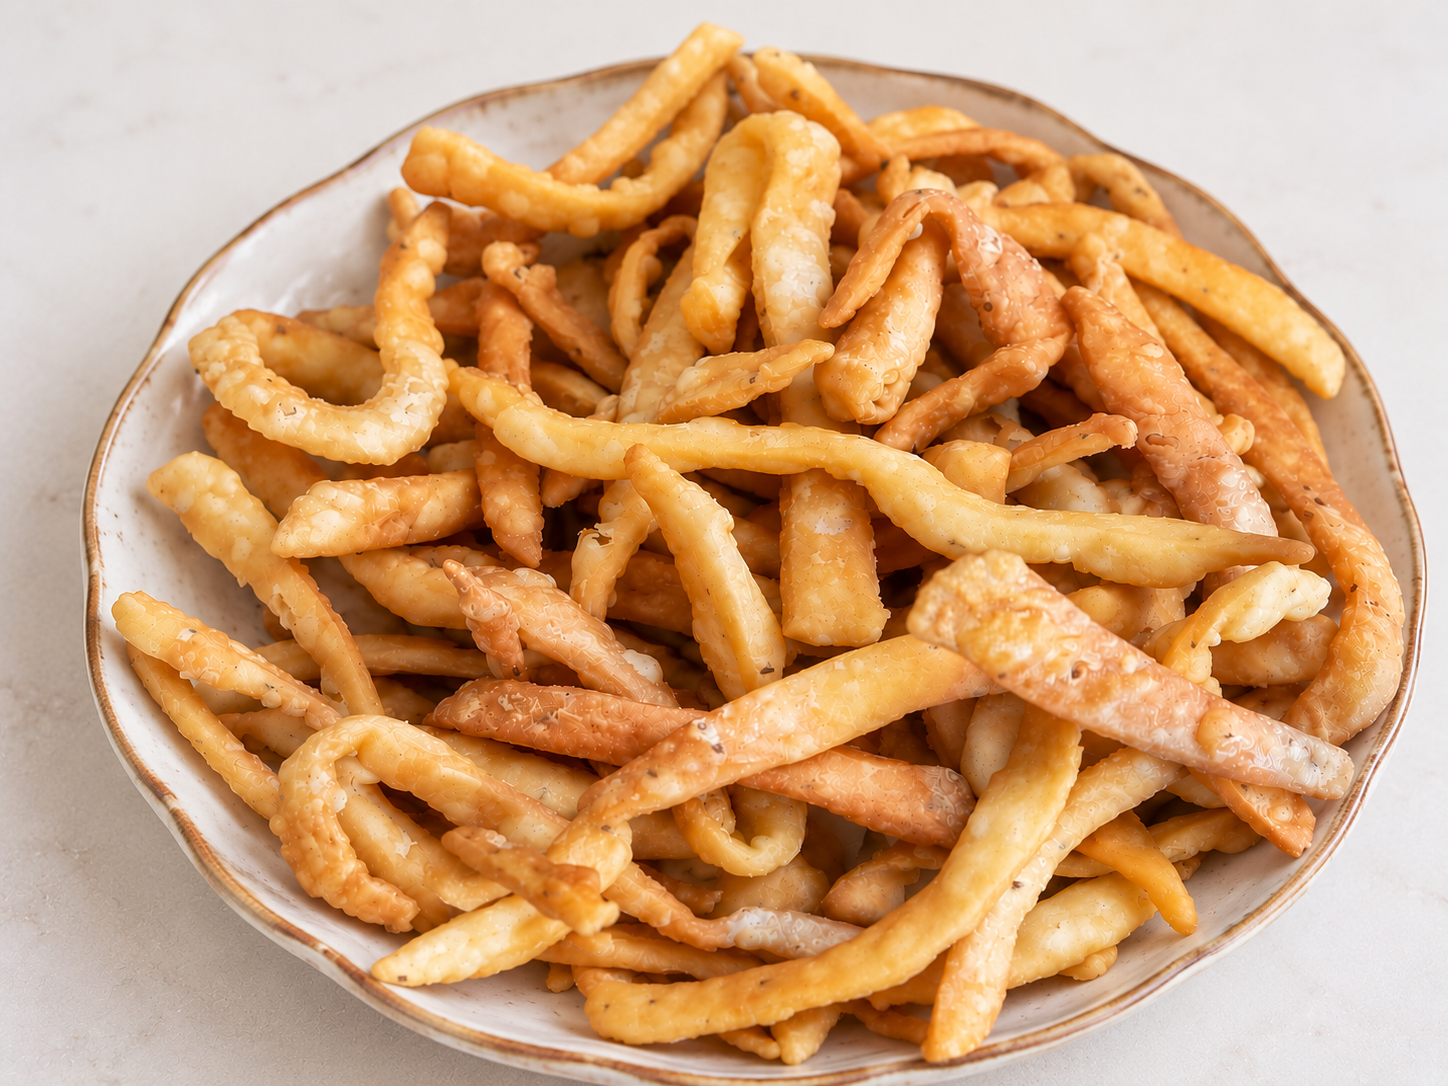
Crispy Namak Pare
Method
- Mix the dry ingredients: Add the all-purpose flour, salt, and ajwain to a large mixing bowl and mix well.
- Add the oil: Pour in ¼ cup oil and rub it thoroughly into the flour with your fingertips until the mixture looks grainy and sandy.
- Do the fist test: Take a small handful of the flour mixture and squeeze it in your fist. It should hold its shape when you open your hand. If it crumbles apart, add 1–2 tablespoons more oil, mix well, and test again.
- Make the dough: Add water a little at a time, using only as much as needed to bring the dough together. Do not over-knead. The dough should be firm and slightly tight, not soft or hard.
- Rest: Cover and let the dough rest for 5–10 minutes.
- Roll and cut: Divide the dough into manageable portions. Roll each portion about ¼-inch thick or slightly thinner and cut into thin strips or your preferred namak pare shape.
- Test the frying oil: Heat oil over medium heat. Drop in a tiny piece of dough. It should rise slowly toward the surface without browning immediately. If it rises and browns very quickly, the oil is too hot. If it remains at the bottom, the oil needs more time to heat.
- Fry: Add the namak pare in batches without overcrowding the pan. Fry over medium-low heat. Leave them undisturbed for the first 2–3 minutes, then gently stir and flip occasionally for even cooking.
- Remove at the right color: Fry until light golden and crisp. Remove them before they become dark golden, as they will continue to deepen slightly in color after coming out of the oil.
- Cool and store: Transfer to a paper towel-lined plate or tray and cool completely. Store in an airtight container at room temperature for up to 1 month.

Leave a Reply